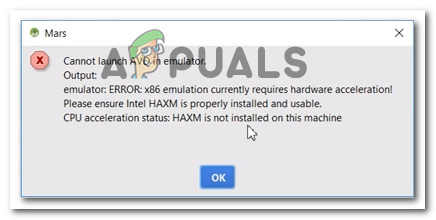
Error: X86 Emulation Currently Requires Hardware Acceleration!
Some users are encountering the "x86 emulation currently requires hardware acceleration!" error when trying to launch the AVD in Android Studio. Typically, the event occurs in a few moments after the user tries to compile an application using Android Virtual Device. The issue is non specific to a certain Android Studio build as it's reported to occur with newer and older builds. The error is not exclusive to a certain Windows version as there are reports of it occurring on Windows seven, Windows 8 and Windows 10.
What is causing the "x86 emulation currently requires hardware acceleration!"?
We investigated this particular issue by looking at diverse user reports and the repair strategies that some afflicted users applied to get the issue resolved. Based on what we gathered, there are a few mutual scenarios that will trigger this item error message:
- Intel/AMD Virtualization engineering is not enabled from BIOS – This fault might go thrown because your CPU is prevented from using the built-in hardware virtualization technologies past a BIOS setting. In this case, the solution is to access your BIOS settings and enable the hardware virtualization technology.
- The Intel HAXM module is non installed in Android Studio – This is one of the almost common reasons why this fault occurs. The installation of Intel HAXM is done in two steps ( downloading the module via the SDK director and running the installation executable).
- A conflict between Avast'south virtualization and Android Studio's AVD – The event can also occur due to a well-known disharmonize between the built-in virtualization applied science and Avast's hardware-assisted virtualization. This 3rd political party feature is also known to conflict with a number of other applications.
- Windows Hypervisor Platform is disabled for AMD CPU – Newer AMD CPUs all have hardware virtualization capabilities. But in order for the virtualization characteristic to work, yous'll need to ensure that the Windows Hypervisor Platform is enabled from the Windows Features screen.
- Machine'southward CPU does not support hardware virtualization – This scenario might be applicable to older CPU models. If hardware virtualization is not supported by the equipped CPU, you lot will not be able to resolve this error message unless you replace your current CPU with a newer model.
If you're currently struggling to resolve the "x86 emulation currently requires hardware acceleration!" error, this article will provide y'all with a option of verified troubleshooting steps. Downward beneath, you lot'll detect several methods that other users struggling to resolve the same effect have used to set or circumvent the issue.
To maintain maximum efficiency, nosotros encourage y'all to follow the methods beneath in the order that they are presented. You lot should somewhen stumble upon a set that is constructive in your particular scenario.
Method ane: Installing the Intel HAXM module
Before accessing the BIOS settings, let's verify if the consequence is non actually triggered past the missing of the Intel x86 Emulator Accelerator (HAXM installer). Without this module, AVD will not be able to compile applications that use hardware virtualization even if the technology is enabled on your computer.
Several users encountering the same error have reported that the outcome went away for skillful after they downloaded the missing module via SDK Managing director and installed it via the HAXM installer. Follow the steps below for complete footstep past step instructions:
- In Android Studio, open SDK Manager by going to Tools > Android > SDK Manager.
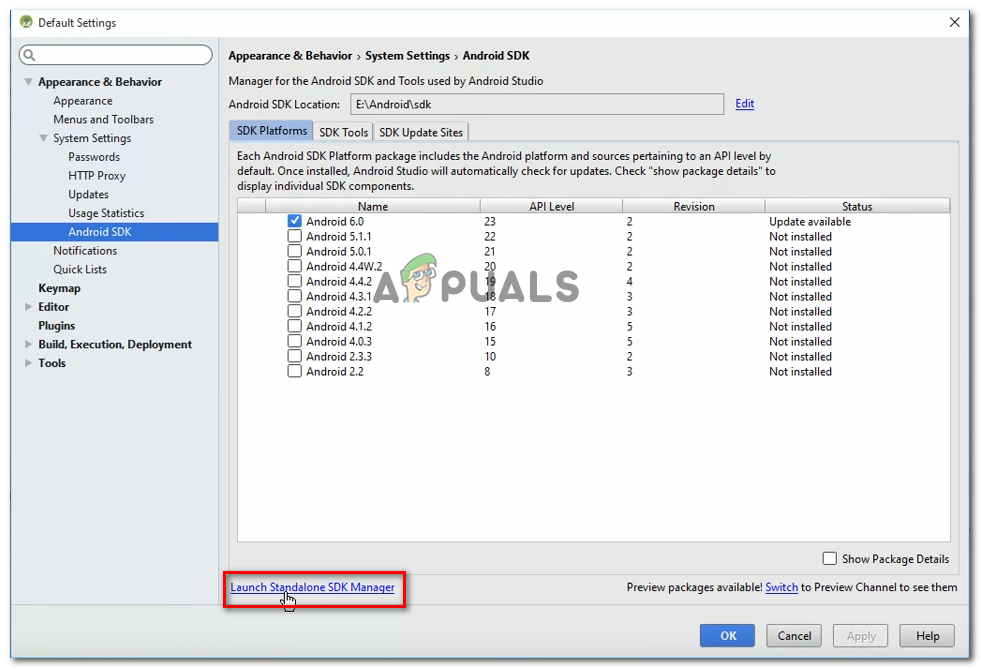
Launching the Standalone SDK Manager Note: You can also go to File > Settings and click on Android SDK (under Organisation Settings). So, but click on Launch Standalone SDK Director to open the built-in installation utility.
- Expand the Extras bill of fare and bank check the box associated with Intel X86 Emulator Accelerator (HAXM). Then, simply click on Install Packagesand expect for the process to complete.
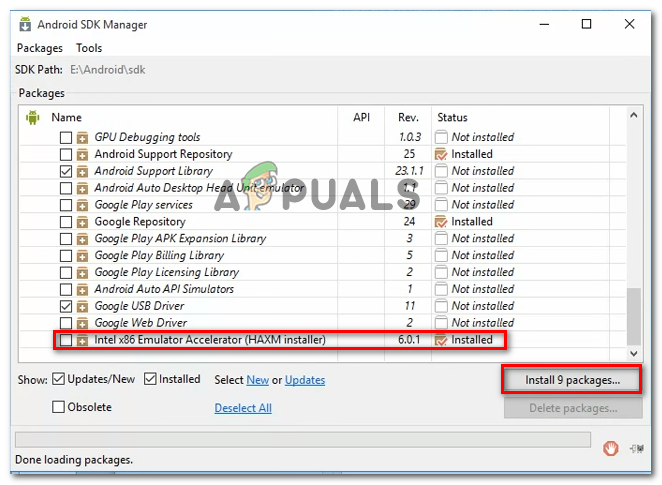
Installing the Intel x86 Emulator Accelerator (HAXM installer) - Now that the HAXM installer is downloaded, we demand to accept the steps appropriated to install it. To do this, navigate to the following location and double-click on intelhaxm-android.exe to install it:
C:\users\%USERNAME%\AppData\Local\Android\sdk\extras\intel\Hardware_Accelerated_Execution_Manager\
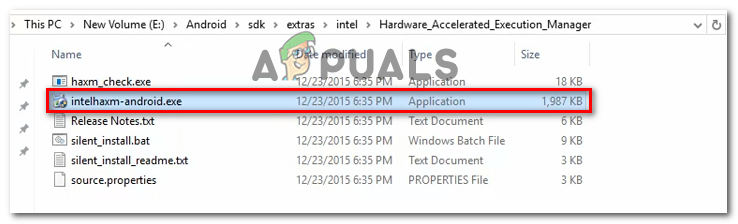
Installing the intelhaxm-android.exe - Follow the on-screen prompts to install the Intel HAXM and look for the process to consummate.
- Restart Android Studio, run the application once again and see if the effect has been resolved.
If you're still encountering the"x86 emulation currently requires hardware acceleration!" mistake, move downwards to the next below.
Method 2: Disabling Hardware-assisted virtualization from Avast
If you're using Avast as an additional security layer, the error is most probable due to a conflict caused past one of its security features. Every bit a lot of users have reported, the hardware-assisted virtualization of Avast is known to conflict with Android Studio's AVD, which ends up producing the"x86 emulation currently requires hardware acceleration!" error.
If this scenario is applicable to you (you have Avast installed) follow the instructions beneath to disable hardware-assisted virtualization from the Settings card of the security suite:
- Open up Avast and admission the Settings menu,
- Inside the Settings carte, go to the Troubleshooting tab and make certain that the boxes associated with Enable hardware-assisted virtualization and Use nested virtualization where available are Unchecked.
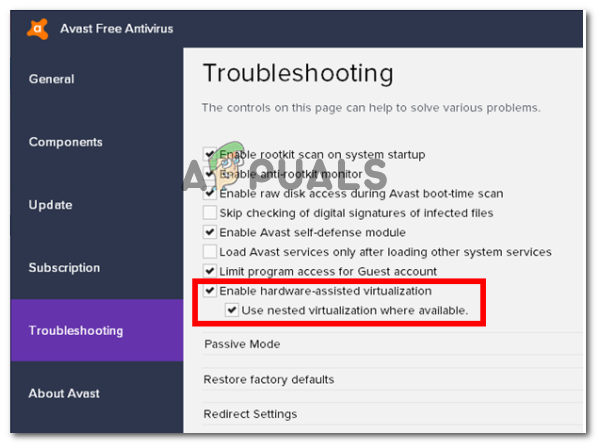
Disable hardware-assisted virtualization inside Avast - Restart your computer and see if the disharmonize has been eliminated at the next startup. Run the application inside Android studio and see if the error has been resolved.
If y'all're still seeing the"x86 emulation currently requires hardware acceleration!" error when running the AVD, move downwards to the next method below.
Method 3: Enabling Hardware Virtualization from BIOS/UEFI settings
If the first method didn't enable y'all to resolve the error message, it's likely that the error message is occurring because hardware virtualization is disabled from your BIOS/UEFI settings. Hardware virtualization should exist enabled past default in normal circumstances, simply manual intervention, BIOS Updates, and even some 3rd party software might disable this technology.
Keep in listen that the process of enabling hardware virtualization will be different depending on your BIOS/UEFI settings and your motherboard and CPU manufacturer.
Even so, the first step would exist to enter your BIOS or UEFI Settings. If yous have the legacy setting menu (BIOS), you'll need to printing the Setup key during the initial booting sequence. The specific setup primal should appear on the initial screen, but in case you don't spot it, you can search for information technology online past using the search phrase "*motherboard model + setup central*".
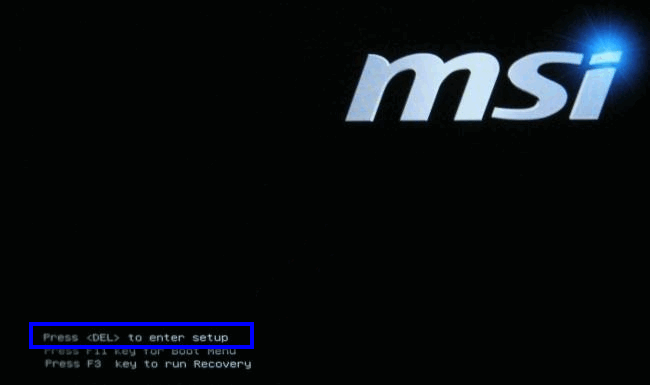
Note: You can besides get near it blindly and printing the most mutual Setup keys during the initial booting sequence. Typically, the setup key is i of the F keys (F2, F4, F6, F8, F10) or the Del key (on Dell computers).
If your computer uses the newer UEFI model, yous volition starting time need to access the Advanced Startup menu. To do this, press Windows key + R to open upward a Run dialog box, and so type "ms-settings:recovery" and press Enterto open the Recovery menu of the Settings app. In one case you get in that location, only click on the Restart at present button nether Advanced startup.
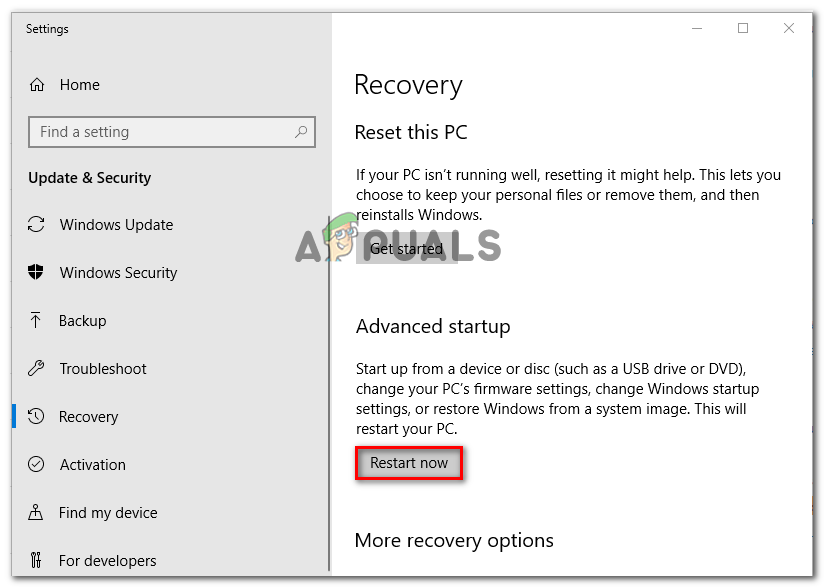
After a while, your calculator will restart directly into the Advanced options menu. Once y'all go there, navigate to Advanced Options carte du jour and click on UEFI Firmware Settings.

One time you've gained entry to your BIOS or UEFI settings, beginning looking for the hardware virtualization option. Depending on your BIOS/UEFI version, you'll find this setting listed under dissimilar names. You lot can typically find it listed as either Virtualization technology (VTx/VTd), Intel Virtualization Applied science or AMD-V Virtualization. Chances are the choice volition be located under Chipset, Processor, Advanced CPU Configuration or something similar.
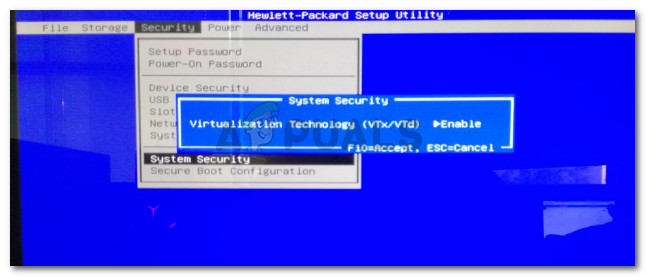
Once yous manage to enable hardware virtualization, save the BIOS/UEFI changes, restart your computer and meet if the fault is resolved at the next startup.
Method 4: Enabling Windows Hypervisor Platform (if applicable)
If you're encountering the issue on an AMD CPU with virtualization technologies (newer CPU models such as Ryzen), the upshot might be occured because Windows Hypervisor Platform is non enabled on your device.
Only proceed in heed that in order to enable this feature, you'll need to ensure that you accept Windows 10 build 1803 or older.
The Windows Hypervisor Platform can exist enabled via the Plow Windows Feature On or Off screen. Here's a quick guide on how to do this:
- Printing Windows key + R to open up up a Run dialog box. And then, type "appwiz.cpl" and printing Enter to open the Programs & features screen.
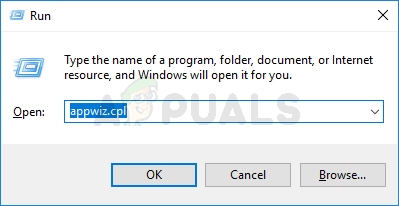
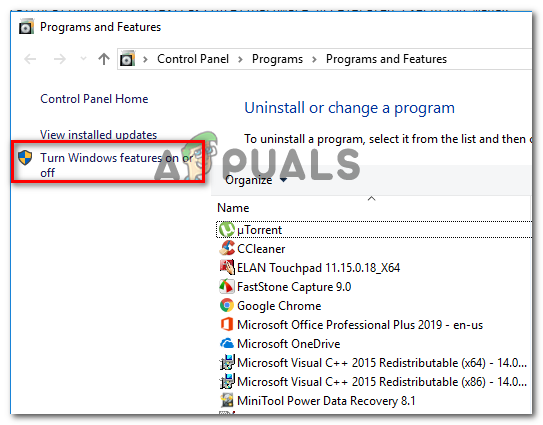
Type appwiz.cpl and Press Enter To Open Installed Programs Folio - Inside the Programs & Features folio, click on Turn Windows features on or off from the left-hand pane.
Accessing the Windows Features screen - Inside the Windows Features window, check the box associated with Windows Hypervisor Platform and striking Ok to enable the characteristic.
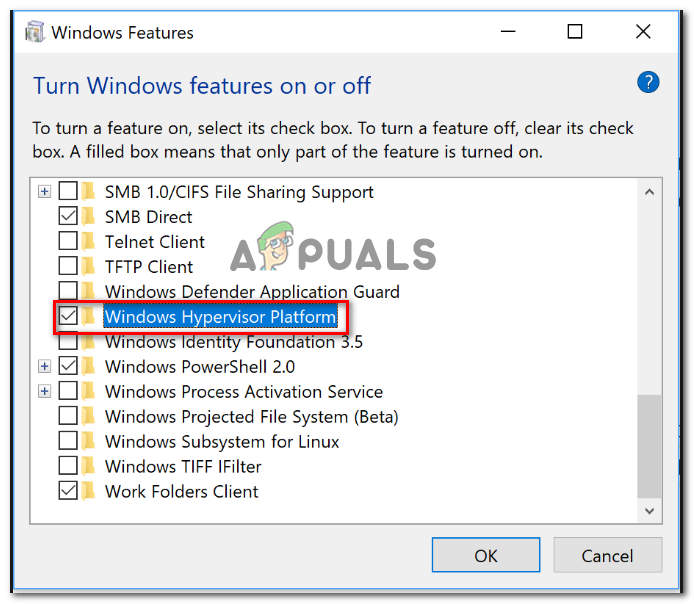
Enable the Hypervisor Platform Notation: While you're no this screen, also ensure that Hyper-V is enabled. If it isn't, enable information technology past checking the box associated with it.
- Restart your calculator and see if the mistake has been resolved.
![]()
0 Response to "Error: X86 Emulation Currently Requires Hardware Acceleration!"
Post a Comment